≡ Menu

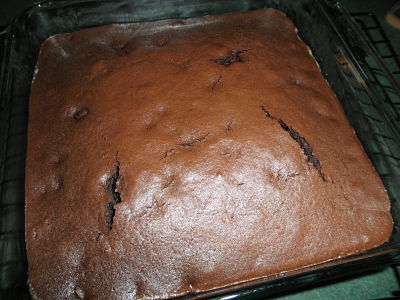
Our family loves this gluten free chocolate birthday cake. This morning, my daughter Jennifer, from Appsforhomeschooling.com,  called and asked me for this recipe for the fourth time. It keeps getting lost in their various moves. Since 2 of her daughters need to eat gluten free, then this is a critical recipe for them! My little granddaughters love this cake and so do we!

gluten_free_chocolate_birthday_cake

Birthdays for children who eat gluten free can be very stressful. In some cities, there are bakeries that specialize in gluten free, so a busy parent can just go and pick one up, at a premium price. If you don't have that luxury or if it is out of your price range, this is an economical alternative that doesn't sacrifice taste.

When you serve this cake at your next birthday party, no one is going to turn up their nose because of a dry crumbly texture. Your child won't feel singled out or different with this gluten free cake. No one will even notice the difference.

Quick and Easy Gluten Free Chocolate Birthday Cake

This is a moist, delicious, easy and simple gluten free cake that actually tastes great.  Most of my wheat eating friends can't even tell that it is gluten free!

2 cups of all purpose gluten free mix

1 1/2  cups of white sugar

1 tsp baking soda

6 tbsp of gluten free cocoa

1/4 tsp of salt

2 eggs

1 cup of cold water

3/4 cup of butter and/or coconut oil or a mix of both

1 tsp vanilla

This is a one bowl cake that doesn't need a lot of preparation time or special instructions. 

Put the all purpose gluten free mix (this will work well with a purchased mix, as well, just make sure that if your purchased mix does not have xanthan gum in it, to add 1/2 tsp to the 2 cups of mix) in a bowl. Add the sugar, baking soda, gluten free cocoa and salt. Beat 2 eggs and add them with the cold water and the butter/coconut oil (you can melt this first, if you want…otherwise room temperature is okay). Add the vanilla and beat well.

Pour the batter into a greased 9 x 13 pan or 2 greased and floured (with sweet rice flour or all purpose gluten free mix) 8 inch rounds.  Bake the cake in a preheated 350 degree F oven for 20-25 minutes. Check at the 20 minute mark and test with a toothpick or cake tester. If it comes out clean, it is done. These times depend on your pan and the accuracy of your oven.

If you prefer making cupcakes, this will make 12 cupcakes that will cook in about 15 minutes. Use cupcake liners, it makes life easier! I have just discovered parchment baking cups from Paper Chef and am excited about how clean cupcakes come out with those. No leaving half your muffin on the cupcake paper anymore!

Make your favorite gluten free chocolate icing, ice the cake after it's cooled and have a great birthday party!!

So when gluten free eating is the new normal in your house, it is really great to have a familiar taste and flavor at birthday time. Celebrate your special day with a gluten free chocolate cake that has earned its place in our family members hearts! I hope you enjoy it!

{ 2 comments }
gluten_free_meat_pie

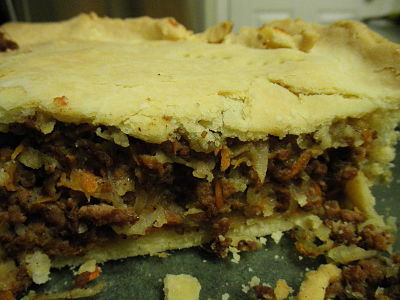
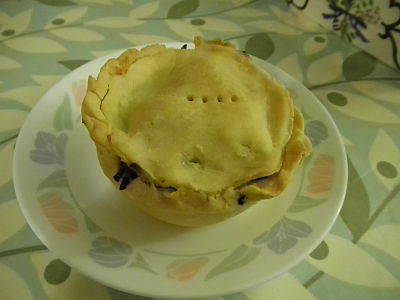
One of my favorite recipes is this one from my Mom that I have adapted to be gluten free. This gluten free meat pie is easily made as individual serving pies, like the one that is shown above or as a family style 9 inch pie. The day that I made these gluten free pies, I did both by doubling the following recipe!

The small pies freeze very well and make a quick and easy meal for taking to work. I used a large muffin pan to make these pies. You could use the small muffin tins and make more (twice as many, actually), since my large muffin pans hold double the batter of the small muffin tins.

West County Gluten Free Meat Pie Recipe

The recipe that follows is for one large 9 inch gluten free pie or 6 large muffin pan sized individual meat pies. It can also be made into 12 regular muffin sized individual gluten free meat pies. It's your choice!

Gluten Free Pastry Recipe

You can use this one or you can use another. I used this one for the recipe and one of the things that I really like about it, is that it does roll out well.

2 1/4 cups of all purpose gluten free mix

1/2 tsp of gluten free baking powder

1 cup of butter and or coconut oil

1/2 tsp of xanthan gum

1/2 tsp sugar

1/2 tsp salt

Mix the dry ingredients in a bowl until well combined. If you use coconut oil, butter, or a mix of both, be aware that extra virgin coconut oil will have a coconutty taste. If you want to use virgin coconut oil for pastry, it will have less of a taste to it.  If your room is warm, your coconut oil will not be solid. It needs to be solid in order for the pastry to work. I have had great results with using just butter, just coconut oil, or a combination of both.

Cut the butter/coconut oil into the dry mix until the mixture looks like small crumbs, about the size of small peas. Don't blend too much!

In a small bowl, whisk one egg, 1 tbsp of apple cider vinegar and 9 tbsp of ice water. You will use approximately 1/2 to 3/4 of this mixture. 

Add the liquid to the dry ingredients, slowly mixing it together until the pastry forms a ball. Don't use too much liquid, the pastry should hold together, not be too dry or too wet.

Roll out on a piece of parchment paper or my favorite, a silicone rolling sheet, dusted with sweet rice flour or more of the all purpose mix. This is enough for a double crust pie or 12-24 tarts.

Meat Pie Mix

1 raw carrot grated

2 medium raw potatoes grated

1/2 medium onion grated

2 cups chopped or ground cooked meat (leftover roast works well, or in this case, cooked lean ground hamburger, about 1 pound)

1 tsp gluten free Worcestershire sauce

3/4 cup of leftover gluten free gravy (or cook 3/4 cup of water, 1 gluten free bouillion cube and approximately 1 tbsp of arrowroot or sweet rice flour together until thickened)

1/4 tsp salt (you can increase or decrease this)

1/4 tsp pepper

I used a food processor to grate the onions, carrot and potato…quick and easy!  Put that in a bowl. Add your spices, gluten free gravy, cooked and drained lean hamburger or leftover chopped roast, Worcestershire sauce (yes,you can buy it gluten free, check out your health food store!). Mix well.

Roll out your bottom crust and put in a 9 inch pie plate (or modify if doing the smaller pies). Put the meat mix on top of the bottom crust. Roll out your top crust and make sure to prick it with a fork or knife, to let steam escape.

Bake in a hot preheated 425 F oven 15 min. Reduce temperature to 350 degrees F and continue baking 20 to 25 minutes longer until crust is golden brown.  You can serve this hot with or without gravy. : D

inside_gluten_free_meat_pie

What is your biggest challenge in going gluten free?


{ 2 comments }

These quick and easy gluten free brownies are done in the blender! Simple, fast and a quick clean up, too, which is a great bonus!

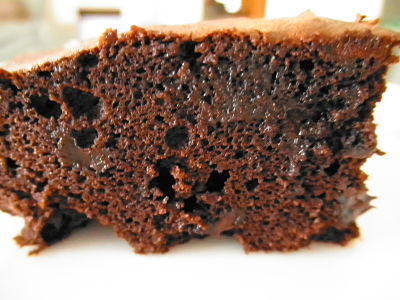
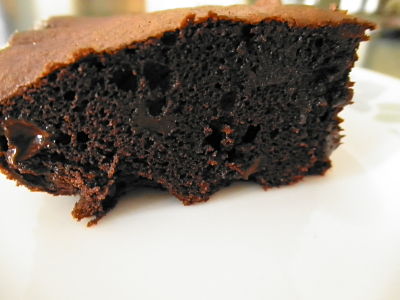
Gluten_free_brownie_cut

Notice the fine crumb on this brownie…it is SO good! 

Gluten Free Blender Brownies

I normally make my gluten free brownies in my Bosch kitchen machine. However, one day, I was in a rush and decided to make them in my Blendtec blender! They turned out SO well. I was thrilled. It was quick and easy!

So here are the instructions for doing it in a heavy duty blender. If your blender can't handle a basic batter, please don't attempt it. Use a mixer and a bowl instead!

This recipe uses coconut flour. If you aren't familiar with it, you might not know that it is a gluten free flour. It is high in protein and fiber, two things that are quite often missing in our gluten free flours. 

*Please don't substitute any other flours for the coconut flour because then it just won't work.

Recipe:

1/3 cup of extra virgin coconut oil and/or butter (if using a mixer, melt butter first)

1/2 cup of gluten free cocoa powder

6 extra large eggs (if you use large, you might need 7)

1 cup of white sugar (you can probably substitute other sweeteners, I haven't)

1/2 tsp vanilla

1/2 tsp salt (iodized or sea salt)

1/2 cup of coconut flour (you will need to buy this in a specialty health food store)

1/2 cup of gluten free chocolate chips

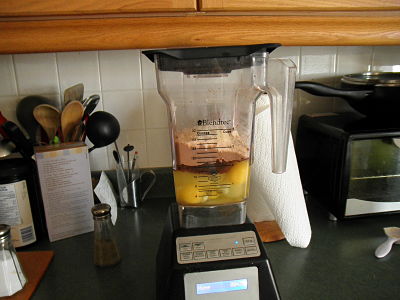
Here is a picture of my blender with all of the ingredients in it. 

brownies_blender

Put all of your ingredients in the blender, except for the chocolate chips and blend on a batter cycle! Add the chocolate chips after by stirring in with a spatula.

If you want to make these with a mixer, here are the steps:

In a medium saucepan, melt coconut oil and/or butter with the gluten free cocoa powder.  Do this over low heat, stirring frequently. Remove from heat when combined and let cool for 5 minutes.

In a separate bowl, mix the white sugar, eggs, vanilla and salt until well combined.  Add the coconut flour slowing, beating until you have a smooth mixture. Add the chocolate chips.

Baking the Gluten Free Brownies

gluten_free_brownies

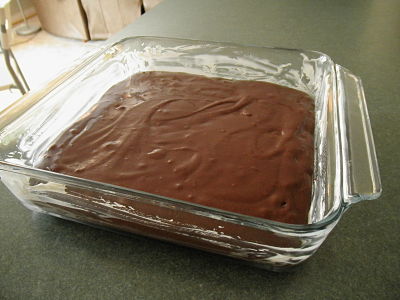
Grease an 8 x 8 pan. I used a pyrex glass baking dish…metal will work just fine, too! Bake in a preheated 350 degree F oven for approximately 25-30 minutes, depending on your oven. Test with a toothpick or cake tester to see if done.

Here is the finished product!

gluten_free_brownies2

These don't last long around our house. I took this picture while the gluten free brownies were still warm. I think, if you look closely, you can see the chocolate chips are all melty….: D

fudgy_gluten_free_brownie

I love these gluten free brownies because they are made with coconut flour. If you noticed, the coconut flour does not need the addition of xanthan gum. That and the fact that you don't use as much coconut flour as you would if you were using all purpose mix, makes it a fairly economical alternative.

Add that to the bonus of the extra fiber and protein and these gluten free brownies in a blender are a win all around. To top it all of, they taste great, too! If you don't want a coconutty taste, just use butter instead of coconut oil in the recipe.

What is the biggest challenge you face in going gluten free?

{ 4 comments }

Who doesn’t love the smell of bread baking in the house? When it is a gluten free bread, the smell is just as delicious as if it was a wheat bread…and the taste! Well, raisin bread was always one of my favorites! This one marries raisins and cinnamon to give you the fragrant aroma of cinnamon and bread baking. It doesn’t get better than this, except for maybe cinnamon buns!

Gluten-free-raisin-cinnamon-bread

Gluten Free Cinnamon Raisin Bread

by Kaelie Ann Huculak Belanger 

Makes a 2 pound loaf

Kaelie has made this is in a bread maker and the instructions are for a Cusinart convection bread maker CBK-200C. *All bread makers have different requirements for amounts, so you might need to modify this according to the needs of your bread maker.

1 3/4 cups Lowfat milk or milk substitute (almond breeze, rice dream, coconut milk etc) room temp 80-90f

3 tbsp vegetable oil, can be either olive, coconut oil, safflower, etc

2 large eggs at room temperature (for food safety and to bring the eggs up to temperature quickly, you can place them in a bowl of hot water for 5 minutes and no longer than 10 minutes)

3 tbsp liquid honey or sugar

1 tsp cider vinegar (this acidity is necessary in gluten free breads, you can substitute lemon juice or white vinegar)

1 1/2 tsp sea salt (or iodized)

4 cups of all purpose gluten free flour mix (please note this mix has xanthan gum in it…if you substitute other gluten free grains, you will need to add xanthan gum)

1 1/2 tbsp of cinnamon

3/4 tsp of gelatine (this is optional)

2 1/4 tsp instant yeast (Fleischmann’s or another instant yeast that is gluten free, it does not need to be bread machine yeast)

1 cup of washed raisins (your choice)

Add the milk, eggs, oil, vinegar and honey to the bread pan fitted with the kneading paddle. A great tip is to mix the dry ingredients in a bowl or a ziploc bag because often the gluten free ingredients get lumpy. Add the mixed dry ingredients to the bread pan and make a small indentation in the top of the dry ing with thumb or spoon (not to deep).

  • Place yeast in your indent.
  • Place the bread pan in your cuisinart.
  • Press menu and select your gluten free option.
  • Press crust and select desired crust to taste (light, medium or dark). I chose Medium.
  • Press loaf and select 2 pounds.
  • Press start to get your bread started.

During kneading, scrape the sides of your bread (using a rubber spatula) pan to get any ingredients sticking on the side.

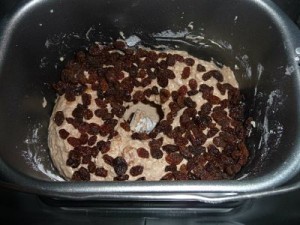
Once the bread is completely kneaded, if your bread machine has an “add” cycle, this is when you put the raisins on top of the mixed dough.

raisins_gf_bread


When cycle is complete after approximately 2 hours and 44 minutes, remove bread from machine and immediately slide it out of the pan onto your cooling rack to prevent sweating or soggy bread.

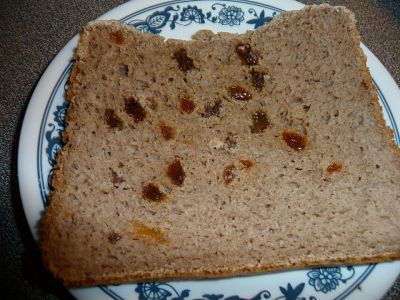
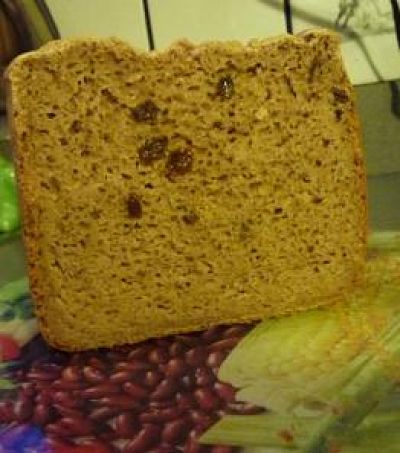
gluten_free_cinnamonraisinbread

Allow to cool then cut and enjoy this heavenly bread. Thanks to Kaelie for providing this recipe to expand our gluten free bread choices! *Please note that Kaelie has modified this from her Savory 3 Cheese Gluten Free Bread recipe. It is amazing the things you can do with a bit of creativity, isn’t it?

Tell me…what is your biggest challenge in following a gluten free diet?

{ 2 comments }

I don’t know about yougluten_free_milk_choc_chip_banana but when I first went gluten free, the first thing that I missed was baked goods. It was difficult to watch other people eating muffins, pastries and cakes. So, when I found the recipe for the gluten free all purpose mix, I thought that I was in heaven. I was able to adapt recipes and have a great substitute for wheat baking.

This is extremely important when you have a child, especially a young one, who might not realize the need to go gluten free. It is important to have similar products so that they don’t have a sense of deprivation. Young children don’t always understand that there is a really good reason for them being gluten free.

When you need a quick snack or a grab-and-go breakfast, these muffins are the answer. They are packed with bananas for nutrition, are gluten free and best of all, easy to whip up and almost fool proof! Thanks, Kaelie, for this great recipe! Kaelie has just recently discovered that her four year old has gluten intolerance. She has decided to share this recipe with us because it is one of young Sam’s favorites, pre discovery of gluten intolerance.


Recipe for Gluten Free Milk Chocolate Chip Banana Muffins

by Kaelie Ann Huculak Belanger

3/4 cup of firmly packed brown sugar

1/2 cup of softened butter, coconut oil or margerine

3 medium very ripe bananas (mashed)

2 large eggs

1 tsp vanilla

2 cups of all purpose gf flour mix 

1 tsp baking soda

pinch of salt

1/2 cup of gluten free milk chocolate chips plus 2 tbsp

Preheat oven to 350 degrees F. Line 18 muffin cups with parchment cupcake cases. In a large bowl combine sugar and butter, beat at high speed for 1-2 min, until mixture is creamy (scrape the sides of your bowl often). Note from Sherie: If you use extra virgin coconut oil, it will make the muffins taste a bit coconutty. It is a good fat, though, so if you don’t mind the taste of coconut, that works!

gluten_free_muffin

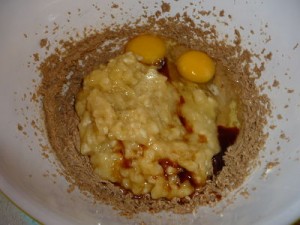
Add vanilla, mashed banana’s and eggs.Continue beating for 2 minutes, till well combined.

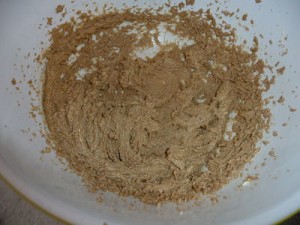
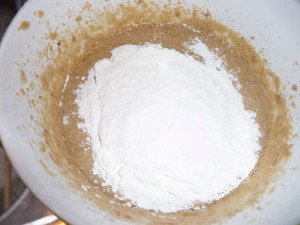
In a medium bowl combine baking soda, pinch of salt and flour. Whisk together. Add your flour mixture to your banana mix. Stir until combined and fold in milk chocolate chips.

gluten_free_mix

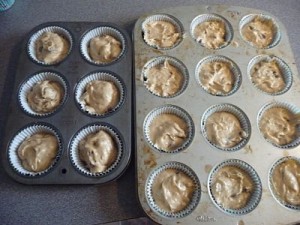
Fill 18 muffin tins and bake for 20-25 min!!! Make sure you test with a cake tester or a toothpick to make sure they are done. : D

fill_muffin_tins

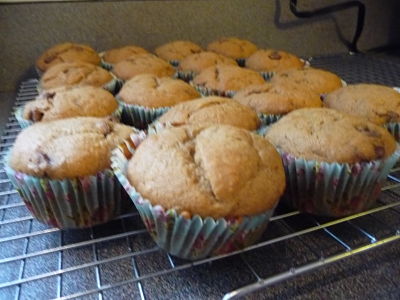
This recipe made 18 large gluten free milk chocolate chip banana muffins. You might not get the same yield, a lot depends on the size of your bananas!

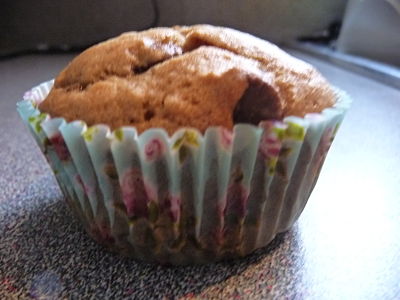
gluten_free_banana_choc_chip_muffins

Enjoy! Now, don’t these look just fabulous?? Can you imagine sinking your teeth into these, fresh out of the oven, with the chocolate chips all warm and melted?

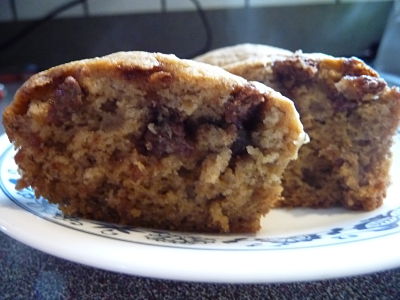
inside_banana_choc_chip_gluten_free

Thanks, Kaelie, for this great recipe, I look forward to trying it! *Bonus tip from Sherie: Freeze your over ripe bananas, unpeeled, in ziploc bags. It’s perfect for using in gluten free recipes, like this!

What is your biggest challenge in going gluten free?

{ 4 comments }